Sign up for Compliance Blog

The Dangers of Neglected Infection Control in Dental Offices

Ayana Guzzino & Kelli Ngariki • October 9, 2023
Woman in lab coat, glasses, and gloves, holding dental tools, looks surprised and points at herself.


In the world of dentistry, the mission is simple: ensure every smile is as vibrant and healthy as it can be. Yet, lurking beneath the pristine surfaces of dental chairs and gleaming instruments, a threat can shatter this mission: neglected infection control.


Let's pull back the dental chair curtain and reveal the stark reality: Inadequate infection control in dental offices can lead to many nightmarish scenarios. Dental offices that fail to comply with CDC Infection Control guidelines and OSHA regulations may experience breaches. These can lead to large amounts of money spent on testing and medical care for those affected and possibly loss of licensing.


A solid infection control program begins with an Infection Control Plan. This plan should consider workplace hazards and develop policies and protocols to diminish or eliminate these risks. By incorporating team awareness, training, and policies in the plan, dental facilities can prevent the most common infection control breaches listed below.


1. Improper Hand Hygiene


We know that your days are packed with patient appointments, sterilizing instruments, cleaning operatories, and keeping everything running smoothly. But here's something that can't be overstated: hand hygiene. It's the foundation of infection control, and inadequate hand hygiene can have dire consequences.

Improper hand hygiene can lead to the transmission of pathogens between dental staff and patients, increasing the risk of cross infections.


To make this manageable in your busy day, we recommend:

  • Adequate training for your staff.
  • Posting signs around the office to serve as reminders.
  • Gentle corrections and cues for team members when needed.
  • Ensuring your whole team is committed to making hand washing a top priority.
  • Random observations to ensure it’s being performed when and as recommended.


2. Improper Use of Personal Protective Equipment (PPE)


It can be a struggle to ensure everyone is using Personal Protective Equipment (PPE) correctly. Lack of training, supply shortages, and misconceptions can hinder proper usage. Non-compliance can be detrimental, potentially increasing the risk of infection transmission during dental procedures affecting dental staff and patients. To address this, it's crucial to provide adequate PPE to all staff, train them in its correct usage, and enforce its consistent use during patient care, cleaning, and device sterilization.


Dental infection control should include:

  • Review tasks performed throughout the day and create policies and procedures outlining necessary PPE
  • Periodically review donning and doffing procedures.
  • Provide adequate PPE for all staff. Ensure correct size and fit for all staff members.
  • Conduct comprehensive training.
  • Enforce consistent use during patient care.
  • Enforce consistent use during environmental cleaning.
  • Enforce consistent use during instrument disinfection and sterilization.


Not only does this protect your patients, but it also instills confidence in your safety program.


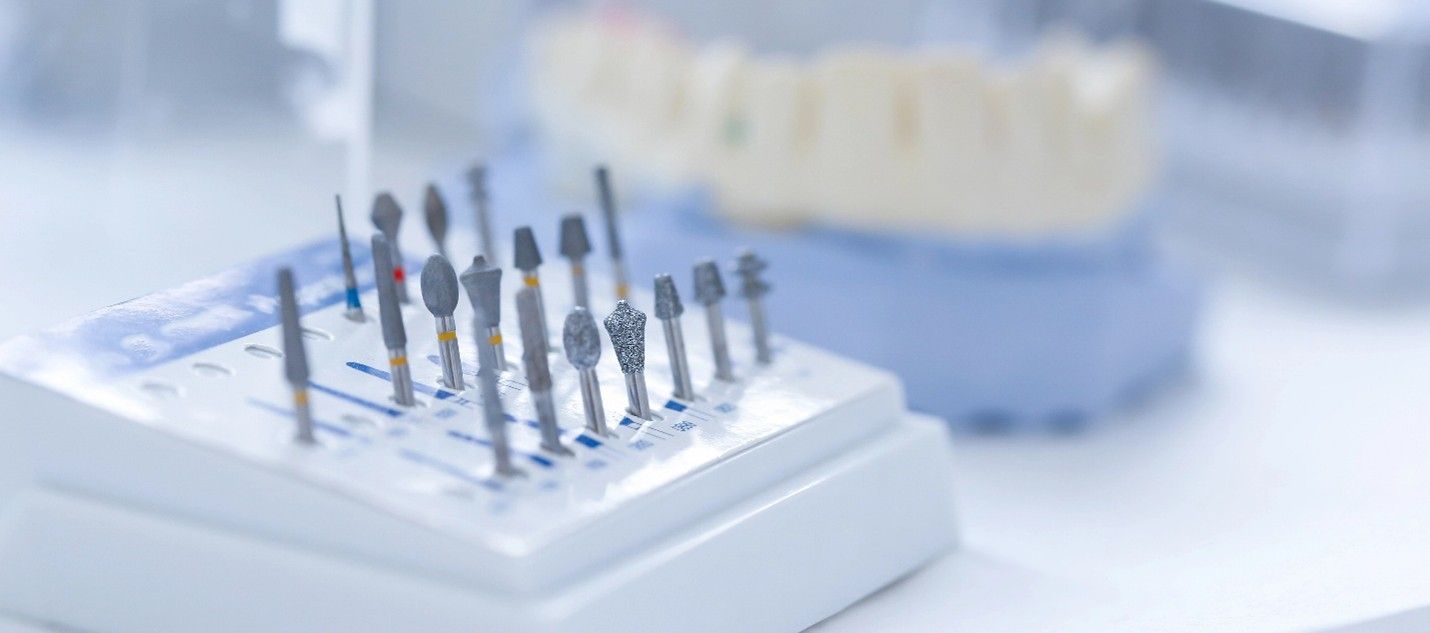
3. Inadequate Sterilization and Disinfection of Dental Instruments


Sterilization and disinfection are the unrewarded heroes of infection control. Properly executed, they eliminate the risk of transmitting infectious diseases between dental patients and healthcare workers.


Sterilization destroys and eliminates all microbial life forms, including bacteria, viruses, and spores. It is needed for instruments that encounter body fluids or the bloodstream. Disinfection reduces the number of pathogenic microorganisms to a level considered safe for patient contact. Disinfection is typically used for surfaces and non-critical instruments that do not penetrate body tissues.


Dental instruments are classified as:


  • Critical Instruments: These instruments directly contact body tissues or the bloodstream and include scalpels and needles. They must be sterilized using methods that achieve a high level of microbial kill.
  • Semi-Critical Instruments: These instruments contact mucous membranes or non-intact skin, but they do not penetrate body tissues. They should be either sterilized or subjected to high-level disinfection.
  • Non-Critical Instruments: These instruments come into contact with intact skin and do not penetrate mucous membranes or body tissues. They can be disinfected using low-level disinfection.


Sterilization Methods:


Standard methods of sterilization for critical and semi-critical dental instruments include:


  • Autoclaving: Steam under pressure is the most commonly used method for sterilization.
  • Dry Heat Sterilization: Some instruments may be sterilized using dry heat ovens.
  • Chemical Vapor Sterilization: Instruments can be sterilized using chemical vapors.
  • Ethylene Oxide (ETO) Sterilization: ETO gas may be used for items that cannot be autoclaved.


Disinfection Methods:


  • High-level disinfection is often achieved using chemical disinfectants approved for medical and dental use.
  • Intermediate-level disinfection may be used for semi-critical instruments.
  • Low-level disinfection is suitable for non-critical instruments and environmental surfaces.


To ensure that dental practices are safe and effective, it is important to establish protocols and assign responsible parties to monitor and document sterilization and disinfection processes. This can involve using chemical, mechanical, and biological indicators, as well as keeping detailed records. Dental healthcare providers need to receive proper training on sterilization and disinfection procedures, to ensure compliance and patient safety. It is important to clean and decontaminate dental instruments immediately after use and before sterilization or disinfection. Proper maintenance of equipment is also crucial to ensure that it functions properly.


Inadequate sterilization and disinfection of dental instruments represent a critical breach in dental infection prevention and control. Research shows that lapses in instrument disinfection and sterilization can contribute to dental healthcare-associated infections (HAIs). These lapses can occur due to equipment malfunction, improper technique, or insufficient training.


The consequences of this breach are severe. Patients can develop infections, including oral infections and systemic illnesses, from contaminated dental instruments. Healthcare offices may face hefty fines and legal actions as consequences. According to Centers for Disease Control and Prevention (CDC), each day, approximately 1 in 31 U.S. patients contracts at least one infection in association with their healthcare, underscoring the need for improvements in patient care practices in U.S. healthcare facilities. 


4. Needlestick and Sharps Injuries


Accidental needlestick and sharps injuries can expose dental healthcare workers to bloodborne pathogens like hepatitis B and hepatitis C. According to the CDC, an estimated 600,000 needlestick injuries and other transdermic injuries occur annually among healthcare workers in the United States. The CDC also reports that about 1 out of 300 healthcare workers accidentally stuck with a needle from someone with HIV get infected. These injuries can happen during the handling and disposal of needles, scalers, or other sharp dental instruments.

The consequences of needlestick injuries can be long-term and potentially life-threatening. Dental workers can contract bloodborne infections, leading to health complications.


To mitigate this risk:


  • Prioritize staff training in safe handling and disposal of sharps.
  • Use safety-engineered devices. Each year, you are required to review potentially safer sharps devices.
  • Maintain and use sharps disposal containers.
  • Regularly review and update sharps handling procedures.


5. Cross-contamination from Contaminated Surfaces and Equipment


It is crucial to keep a dental office free from cross-contamination caused by contaminated surfaces and equipment. Failure to properly clean and disinfect dental surfaces and equipment can result in harmful bacteria and viruses lingering, which poses a significant risk to both patients and healthcare providers. Research shows that Hepatitis B can live on surfaces for 7 days.

Instruments used in invasive procedures that come into contact with bodily fluids must be sterilized to eliminate microorganisms. Even seemingly harmless surfaces, such as doorknobs and light switches, can be breeding grounds for germs if not regularly disinfected. To ensure a safe and healthy environment, dental teams must adhere to strict protocols, including wearing gloves, masks, and other protective gear and meticulously cleaning and disinfecting all surfaces and instruments. This not only ensures the well-being of their patients but also their staff. Inadequately cleaned and disinfected surfaces and equipment can lead to cross-contamination, a serious concern in dental offices. These incidents can occur due to oversight or lapses in cleaning protocols and can have varying consequences.


To prevent this:


  • Adhere to strict protocols.
  • Meticulously clean and disinfect all surfaces and devices using EPA-approved products.
  • Establish comprehensive cleaning and disinfection schedules and ensure they are followed.


The consequences of cross-contamination are far-reaching. It can lead to the transmission of pathogens between patients and dental staff, potentially causing infections and harm. To prevent this, it's essential to develop a comprehensive cleaning and disinfection schedule for all surfaces and equipment, with a particular focus on high-touch areas.


6. Improper Management of Dental Unit Waterlines


Failure to maintain and disinfect dental unit waterlines can lead to biofilm growth and the potential release of waterborne pathogens during procedures. In recent years, there have been reports of human illnesses and deaths caused by contaminated water from dental unit waterlines.


Biofilm buildup in dental unit waterlines can result from non-compliance with maintenance and disinfection protocols, potentially releasing waterborne pathogens during dental procedures, posing a risk to patients and dental staff.


To mitigate this risk, consider:


  • Test waterline bacterial count.
  • Regularly disinfect dental unit waterlines following manufacturer recommendations.
  • Work with equipment manufacturers to ensure that their dental treatment water meets or exceeds the standards set by EPA for drinking water. 
  • Use commercial devices and procedures to improve water quality.
  • Use source water containing less than 500 CFR/mL of bacteria.
  • Clean self-contained water systems.
  • After each patient, run any dental device used in the mouth and connected to the dental water system for a minimum of 20-30 seconds.


Conclusion


In conclusion, neglected infection control in dental offices poses serious risks. From improper hand hygiene to inadequate sterilization, the consequences can be severe for both patients and staff.


To mitigate these risks, dental practices must prioritize proper hand hygiene, ensure correct PPE use, maintain meticulous instrument sterilization and disinfection, address needlestick injuries, prevent cross-contamination, and manage waterlines effectively.


Neglecting infection control can not only lead to patient infections and legal consequences but also put the safety of staff members at risk. Therefore, dental professionals must invest in training, equipment maintenance, and safety culture to provide quality care and ensure the safety of everyone involved in the mission of dentistry: vibrant, healthy smiles free from infection.


The learning doesn’t stop here; treat your staff to engaging, practical infection control training for dental professionals. Not only is Infection Control Certification required for your license, but it’s also best practice and should be conducted annually. Plus, it's a great opportunity to engage with your staff and ensure everyone is on the same page. 


Don't let infection control breaches jeopardize your patients' health and your practice's reputation. Sign up for Infection Control Training today!


Sources:

Bloodborne Pathogens - Evaluating and Controlling Exposure | Occupational Safety and Health Administration (osha.gov)


Sharps Safety for Healthcare Settings | CDC


From Policy to Practice: OSAP’s Guide to The CDC Guidelines


By Kelli Ngariki November 24, 2025
In fast-paced dental and medical clinics, it’s tempting to rely on a STATIM sterilizer—a type of immediate-use steam sterilizer—to quickly process instruments. But using this device appropriately is critical to patient safety and regulatory compliance. This post breaks down when and how to use STATIM sterilization based on CDC flash sterilization guidelines, helping small healthcare practices stay compliant without cutting corners. What Is an Immediate-Use Steam Sterilizer (STATIM)? A STATIM sterilizer is a specialized piece of equipment used for immediate-use steam sterilization (IUSS), formerly known as flash sterilization. It’s designed to rapidly sterilize medical and dental instruments that are urgently needed for patient care—not for routine or convenience-based use. When Is It Acceptable to Use a STATIM Sterilizer? According to CDC sterilization standards, STATIM use is acceptable only when: • The instrument is urgently needed and there’s no time to sterilize using standard packaging and storage methods. • It’s not being used to compensate for having too few instrument sets or to save time during busy periods. CDC Guidelines for Flash Sterilization: What You Must Do Following these steps will help you stay compliant with CDC and OSHA infection control requirements: 1. Limit Usage to Urgent Needs Only use STATIM sterilization for instruments needed immediately for patient care. 2. Do Not Use for Convenience Avoid using it as a way to speed up workflow or compensate for inadequate inventory. 3. Thoroughly Clean Instruments First All instruments must be fully cleaned and decontaminated before entering the STATIM cycle. 4. Do NOT Store Unwrapped Items After sterilization, transfer instruments (or handpieces) directly to the point of use in a sterile container or tray. Never store unwrapped items. 5. Use Approved Containers Only Only use flash sterilization containers or trays designed for high-temperature steam. 6. Monitor All Sterilization Cycles • Use biological indicators at least weekly. • Use chemical and mechanical indicators in every STATIM cycle. 7. Prevent Contamination During Transfer Maintain a clean transfer process. Ensure that items aren’t contaminated during handling or transport. Best Practices for STATIM Sterilizer Use in Dental and Medical Clinics • Keep backup instrument sets available to reduce reliance on immediate-use cycles. • Ensure staff are trained on STATIM operation and CDC sterilization protocols. • Document and log every STATIM cycle, including indicator results. • If your clinic is frequently using the STATIM for convenience or to keep up with patient flow, consider investing in an additional autoclave to support proper instrument processing and reduce compliance risks. Learn More from the CDC For detailed guidance on sterilization in healthcare settings, visit the CDC’s official page: 🔗 CDC Sterilization Guidelines Need help with infection control compliance in Oregon? We can help you build or update your written sterilization protocols to meet CDC standards. Email us at support@OshaHipaaTraining.com.
By Kelli Ngariki November 18, 2025
If you've ever wondered about the right way to clean and sterilize dental burs, you're not alone. The CDC gives general guidance for sterilizing dental instruments, but doesn’t get into bur-specific details. Regardless of which autoclave you use, the process for burs remains largely the same. Here's how to do it right. The CDC's Take: General Guidelines The Centers for Disease Control and Prevention (CDC) classifies burs as critical or semi-critical instruments, depending on how they’re used. That means they need to be heat sterilized. But before you toss them in the autoclave, they need to be properly cleaned and packaged. Step-by-Step: Best Practices for Burs Here’s how to apply infection control principles in your practice: 1. Identify Your Burs Single-use or Reusable? Check manufacturer instructions. If there are no validated reprocessing instructions, consider the bur single-use and toss it after one use. 2. Pre-clean and Inspect Remove debris immediately after use. Use an ultrasonic cleaner or manually scrub with a detergent or enzymatic solution. Rinse and dry completely. Inspect for damage or wear. If damage, wear, or corrosion: Remove the bur from use (even if minor damage) Discard it in the sharps container For quality control and tracking, consider documenting the discard and the reason. Never try to repair or reuse. 3. Packaging for Autoclaving Best Practice: Use a Bur Holder or Cassette Place burs in a bur block, bur guard, or instrument cassette designed for sterilization. Choose holders that are autoclave-safe (heat-resistant and able to withstand moisture). Then wrap or pouch the holder itself—not the loose burs. Bonus Tip: Some bur blocks come with color-coded or numbered slots so you can standardize bur sets per procedure. If you're using a pouch: make sure the bur holder fits comfortably and the pouch is sealed with chemical indicators inside. Use sterilization pouches or wraps approved for steam sterilization. For small batches, individual pouches work fine. Larger loads can go in wrapped cassettes. Seal all packaging properly and include internal and external chemical indicators. 4. Load Placement in the Autoclave Place pouches paper side up (or follow your pouch manufacturer’s instructions). Don’t overcrowd the trays. Allow space between items. Do not let pouches or cassettes touch the chamber walls. Cassettes should be placed horizontally unless your autoclave manual says otherwise. 5. Choose the Right Cycle Pick the cycle that matches your packaging: "Pouches," "Wrapped Cassettes," or similar. Make sure to allow full drying time to prevent moisture-related contamination. 6. Post-Sterilization Handling Let packs cool and dry fully before handling. Store in a clean, dry area away from sinks or contamination zones. Reprocess any items in compromised packaging. A Note on Sterility and Performance Burs are small and intricate, making them tricky to clean. Over time, reusing them can reduce cutting efficiency and increase the risk of breakage. Keep track of how often burs are reused and inspect regularly. Documentation Matters Make sure your infection control manual includes: Bur inventory (type and classification) Manufacturer instructions for cleaning and sterilization Step-by-step packaging and sterilization protocol Inspection and discard criteria Final Thoughts Using your autoclave the right way means following a solid protocol: proper cleaning, smart packaging, and correct cycle selection. When in doubt, refer to the bur manufacturer's IFU and document everything. Ready to Step Up Your Compliance Game? Book a Compliance Risk Review with us today. We'll evaluate your sterilization protocols, OSHA readiness, HIPAA safeguards, and infection control practices to make sure your office is fully protected and audit-ready. Don’t wait for an inspector to find the gaps—let’s fix them now. Call Lindsay at 541-345-3875 ext. 3 .
why-bleach-should-never-be-used-in-dental-unit-waterlines-blog
By Kelli Ngariki November 3, 2025
The Temptation: “Bleach Kills Everything… Right?” When biofilm builds up in dental waterlines, it’s tempting to grab that familiar bottle of bleach and think, “This will take care of it.” But here’s the truth: while bleach does kill bacteria, it can also damage your equipment, corrode your lines, and void your warranties—all while failing to meet the requirements set by the CDC and EPA for dental unit waterline treatment. The Science: Why Bleach Fails the DUWL Test Dental waterlines are delicate systems that require a balance of disinfection, safety, and equipment compatibility. Here’s why bleach (sodium hypochlorite) doesn’t belong anywhere near them: Not EPA-Registered for DUWLs: The EPA maintains a list of antimicrobial products approved for dental unit waterline use. Bleach isn’t on it. Using an unregistered product puts your practice out of compliance and at risk during inspections. Corrosive to Dental Equipment: Bleach corrodes metal fittings, valves, and plastic tubing, leading to leaks and costly repairs. It also degrades O-rings and adhesives inside the dental unit—issues that can cause long-term system failure. Doesn’t Rinse Cleanly: Bleach leaves chemical residues that are difficult to flush completely, creating a potential safety hazard for both patients and staff. No Validated Instructions for Use (IFUs): Without IFUs for dilution or contact time, there’s no safe way to know how much bleach (if any) could be used without harming your unit—or your patients. The Safer, Smarter Way to Shock and Maintain Your DUWLs To eliminate biofilm safely, choose EPA-registered products that are specifically formulated for dental waterlines and validated by equipment manufacturers. Common and trusted options include: Hydrogen peroxide–based systems (e.g., ProEdge Liquid Ultra, Sterilex Ultra, Mint-A-Kleen) Silver-ion systems (continuous maintenance tablets) Iodine or peracetic acid formulations These products are tested for: Compatibility with dental materials Safety for patients and staff Proven effectiveness against biofilm Real-World Lessons: Quick Fixes = Costly Problems One hygienist shared her experience: “We tried diluted bleach as a quick shock because we were low on supplies. Two weeks later, we failed our waterline test—and had to reschedule four patients.” Shortcuts might seem efficient, but they often result in failed water tests, system repairs, and frustrated patients. Best Practices for Dental Waterline Compliance Follow the manufacturer’s instructions for use (IFU) for your dental unit and treatment product. Perform a shock treatment as recommended (typically quarterly or after test failures). Use a continuous treatment product between shocks. Test monthly or per IFU, or state and CDC guidance to ensure ≤ 500 CFU/mL. Key Takeaway Bleach belongs in your laundry room, not in your dental unit waterlines. By using approved products and consistent testing, your practice can stay safe, compliant, and confident—without risking costly equipment damage or failed inspections. Want Help Simplifying Your DUWL Protocols? At Healthcare Compliance Associates, we help dental teams across Oregon develop waterline maintenance programs that pass testing the first time—every time. 👉 Contact us today to schedule a compliance consultation or waterline protocol review. 541-345-3875 📞 www.oshahipaatraining.com
Finger with a drop of blood and a syringe, likely for blood sampling or injection, on a white background.
By Kelli Ngariki October 30, 2025
Needlestick or sharps injury at work? Learn when and why you're required to file a workers’ comp claim — and how it ties into OSHA compliance.
By Ayana Guzzino October 20, 2025
Workplace violence is an unfortunate but real risk in today’s healthcare environment. Whether it's verbal abuse from a frustrated patient or a physical altercation in a high-stress setting, violence in the workplace threatens not only employee safety but also patient care quality, operational stability, and legal compliance. For healthcare practices, taking a proactive and compliant approach to workplace violence prevention isn’t just good policy—it’s a regulatory and ethical imperative. Why Workplace Violence Prevention Matters in Healthcare Healthcare professionals face a higher risk of workplace violence than employees in many other industries. Factors like long wait times, emotionally charged environments, behavioral health challenges, and open-access facilities all contribute to this vulnerability. Proactively addressing these risks protects staff, reassures patients, and demonstrates a practice's commitment to safety and compliance. 5 Core Objectives for a Violence Prevention Program To build an effective workplace violence prevention strategy, your practice should implement the following foundational elements: Adopt a Written Zero-Tolerance Policy - Establish a formal, practice-wide policy stating that physical and verbal violence will not be tolerated—from anyone, including patients, staff, and visitors. Educate and Train Employees Regularly - Ongoing training empowers staff with tools to de-escalate situations, identify red flags, and respond appropriately in high-risk scenarios. Promote Incident Reporting and Risk Mitigation - Create a culture of openness where staff feel comfortable reporting concerns or incidents without fear of retaliation. Ensure Retaliation-Free Reporting - Clearly state that no employee will suffer negative consequences for reporting violence or unsafe conditions. Implement a Clear Security Policy - Define responsibilities, procedures, and enforcement protocols to manage potential threats effectively. Leadership Commitment is Essential Leadership sets the tone. Management must be fully invested in fostering a safe environment for staff, patients, and visitors alike. This includes allocating resources, enforcing policies consistently, and modeling the expected standards of conduct. Conducting a Workplace Violence Risk Assessment Understanding your unique vulnerabilities is key. An assessment should evaluate: Unrestricted public access Long patient wait times Presence of individuals under the influence Isolated or poorly lit workspaces Remote or understaffed locations History of past incidents This risk evaluation helps tailor your prevention strategies to the actual threats your practice faces. Implementing Effective Controls Workplace violence prevention involves both engineering controls (physical modifications) and administrative controls (policy and procedural improvements). Engineering Controls: Install panic buttons or silent alarms Hire security personnel during peak times Monitor secondary entrances Improve parking lot and exterior lighting Administrative & Work Practice Controls: Maintain clean, calm, and well-organized waiting areas Communicate your zero-tolerance policy to all stakeholders Document all incidents in an on-site Incident File Train staff in conflict de-escalation and response protocols Implement a buddy system for walking to parking areas Dismiss patients or staff who pose repeated threats Call law enforcement when needed Educating Patients and Preventing Escalation Managing patient expectations can reduce tension. Clearly communicate estimated wait times, behavioral expectations, and escalation procedures. Staff should be trained to remain calm, neutral, and professional in all interactions—especially under stress. Encouraging Immediate and Detailed Reporting Timely reporting of threats or incidents—whether physical or verbal—is vital. Employees should report any concerns to their supervisor or the designated Safety Coordinator immediately. Each report helps identify systemic risks and informs necessary changes. Use OSHA-compliant tools like the Violence Incident Report Form to maintain accurate records and document your compliance efforts. Resources and Further Learning Workplace Violence: Can It Happen Where You Work? Patient Dismissal Final Thought A proactive workplace violence prevention plan protects your team, meets OSHA expectations, and fosters a culture of safety and respect. If your practice is ready to take the next step in strengthening your compliance program, Healthcare Compliance Associates is here to help. We offer tailored support, training, and policy development to ensure your team feels secure and your practice stays compliant. Contact us today to learn how we can partner with your practice to build a safer, more compliant workplace.
By Ayana Guzzino September 23, 2025
In healthcare, safety is a wide umbrella. Offices often hold meetings about patient safety, covering topics such as infection control, secure handling of medical records, or protecting patients from hazards. While these conversations are essential for high-quality care, they are not what OSHA means when it requires safety meetings. OSHA’s concern is the safety and health of employees. The law is designed to protect workers from occupational hazards—everything from bloodborne pathogens and needlestick injuries to chemical exposure, fire hazards, and ergonomic risks. Safety meetings, as OSHA defines them, must center on the risks your employees face while doing their jobs. Learn more about the Oregon OSHA Rule: Division 1, 437-001-0765, Safety Committees and Safety Meetings
By Ayana Guzzino September 17, 2025
OSHA complaints can feel like a thundercloud over any healthcare practice—stressful, costly, and disruptive. But here’s the truth: most of these complaints don’t arise from bad intentions. They usually come from small, preventable gaps that leave employees feeling unheard, unsafe, or undervalued. The good news? By fostering trust, addressing issues quickly, and embedding compliance into daily routines, providers can reduce the likelihood of a complaint while creating a stronger, healthier workplace. 1. Address Safety Concerns Quickly When employees raise a concern, speed matters. Even seemingly small fixes—like repairing a chair, replacing a sharps container, or updating worn signage—show staff that their well-being is a priority. Prompt action prevents small frustrations from growing into formal complaints. 2. Pay Attention to Meeting & Training Time OSHA is clear: safety trainings and meetings must count as paid work hours. If staff feel they’re losing personal time or wages, resentment builds. Over time, that frustration can turn into a complaint. Respecting employee time reinforces fairness and builds trust. 3. Encourage Open Communication Most employees don’t want to go outside the practice for support—they want to feel heard internally. Create channels where staff can safely share concerns without fear of retaliation. Whether it’s a suggestion box, open-door policy, or regular check-ins, communication prevents escalation. 4. Build a Compliance Culture Compliance shouldn’t feel like an afterthought. When safety becomes part of the everyday routine—woven into policies, trainings, and follow-through—employees feel valued and secure. A consistent culture sends the message that protecting staff is everyone’s responsibility. 5. Provide Clear Guidance OSHA standards can feel complex, and confusion often leads to mistakes. Simplify the process by breaking rules into clear, practical steps that make sense for your team’s day-to-day workflow. Clarity reduces miscommunication and builds confidence. The Takeaway Most OSHA complaints can be prevented by creating a respectful, responsive environment where safety is more than a requirement—it’s a shared value. Proactive attention to concerns not only avoids costly complaints but also strengthens trust, morale, and long-term team stability. When employees know their voices matter and their safety is a priority, they’re far more likely to bring solutions forward instead of frustrations to OSHA.
By Kelli Ngariki September 3, 2025
Delays in receiving medical records are one of the most common frustrations we hear about from healthcare offices. Whether you’re waiting on x-rays, patient histories, or treatment notes, it can feel like a simple request is suddenly wrapped in red tape. With a clear understanding of HIPAA regulations, a collaborative approach, and a steady focus on quality patient care, your clinic can reduce friction, improve communication with other offices, and navigate records-related delays with greater confidence and clarity. To make this process even easier, we’ve created a set of ready-to-use Records Request Email Templates for healthcare offices . These templates were designed to help you communicate clearly, avoid delays, and stay HIPAA- and state-compliant. Download the Records Request Email Templates A Common Scenario: When Policy Becomes a Barrier A dental office submits a request to another provider for a patient’s records, which are needed before a scheduled procedure. The other office replies that the request must be submitted through their specific online portal — and once submitted, it may take up to 30 business days to process. No confirmation is provided, and no status update is available. The patient is growing anxious, the procedure must be rescheduled, and the receiving office is left feeling frustrated and powerless. This situation doesn’t reflect a bad actor. It reflects a inefficient process, often due to: Understaffed administrative teams Lack of understanding about the HIPAA rules Overreliance on policy templates Outdated systems for records handling The good news? There are realistic, professional steps you can take to move things forward — and avoid unnecessary conflict. What the Law Says About Records Release HIPAA Right of Access Under the federal HIPAA Privacy Rule: Patients have the right to access their records. Records must be provided within 30 calendar days (with an optional 30-day extension if justified in writing). Providers may require a written request but cannot create unreasonable delays or barriers. Full guidance: HIPAA Right of Access – HHS.gov Oregon Rule (Dental): Oregon dental providers must provide records, including x-rays, within 14 days of a written request from the patient or their guardian. Refer to OAR 818-012-0030(9)(a) for direct language. Internal policies should support timely care, rather than hindering it. Records Release Toolkit These steps are designed to support your office in responding effectively, lawfully, and professionally when facing delays in receiving patient records. Clarify and Confirm Ensure the records request was received. Ask if additional documentation or formats are preferred (fax, secure email, form submission). Offer to resend or adjust the request to their stated process, so long as it does not impose unreasonable delays. Connect with the Right Person If initial communication isn’t productive, request to speak with a supervisor or office manager. Approach the conversation with the goal of: Understanding their process Building a cooperative relationship Identifying a smoother path forward for both offices Sample language: “We’d like to make this process easier for everyone involved. Who is the best person to speak with about streamlining this request and ensuring the patient receives timely care?” Provide Educational Context If helpful, you may share federal guidance or state law — not as a threat, but as context: “We understand your office has internal policies, but understand that under HIPAA and Oregon law, patient records must be released within specific timelines, and processes cannot create unreasonable delays. We’re happy to collaborate in a way that works for both offices and puts the patient’s needs first.” Empower the Patient Patients often get faster responses. Encourage them to: Submit their own written request Note the urgency for treatment Request an estimated date of release Reference their right to access under HIPAA You can also provide the patient with a link to HHS’s Right of Access page for more information. When It Might Be Information Blocking The 21st Century Cures Act prohibits covered entities from interfering with access to or use of electronic health information. While most delays are not intentional, consistent or unexplained refusals to share records may fall under the category of information blocking . To learn more: Information Blocking FAQ – HealthIT.gov Report a Complaint – OCR Use this step when education and collaboration have failed, and there’s clear harm being done to the patient’s ability to receive care. Focus on Collaboration, Not Conflict Delays in care can be deeply frustrating, especially when you’re doing everything right. Still, it’s important to remember that many offices are working with limited resources, under pressure, and with outdated systems. Most delays are not acts of harm — they are opportunities for system improvement and clearer communication. By staying professional, knowledgeable in law, and focused on the patient, your office can be a model for collaborative, compassionate compliance. Need Support? If you need help navigating a difficult records release situation, reach out anytime at: Phone: (541) 345-3875 Email: Support@OshaHipaaTraining.com And if you want to save time and take the guesswork out of your records requests, grab our free Records Request Email Template Pack — including the initial request, follow-up, and escalation messages. Get your templates here!
Dentist in lab coat, angry expression, holding tools, raising hand, studio background.
By Kelli Ngariki August 25, 2025
Annual dental infection control training isn’t optional. Learn why CDC and OSHA require all dental healthcare personnel to complete infection prevention training every year—and how your practice can stay compliant and audit-ready.
By Ayana Guzzino August 21, 2025
Email is one of the most common ways healthcare offices communicate — with patients, vendors, and within their own teams. Unfortunately, it’s also one of the most common ways cybercriminals try to gain access to sensitive information. One of the most deceptive tactics is the spoof email. In this blog, we’ll break down what spoof emails are, how to spot them, how to prevent them, and what to do if your office — or your patients — receive one. What Is a Spoof Email? A spoof email is a fraudulent message designed to look like it came from someone you trust — a coworker, your clinic, or even a vendor you regularly work with. Cybercriminals forge the “From” address so that the email appears to come from a legitimate source, even though it did not originate from that account. For example: A message that looks like it’s from your doctor asking you to open an attachment. An email appearing to come from a coworker requesting urgent action. An attached “voicemail” or “secure document” that looks like it’s sent from a colleague but actually contains malicious software. How to Detect a Spoof Email Spoof emails are designed to look convincing, but they usually carry warning signs. Train your team to pause and check for: Unexpected attachments or links — especially audio files, invoices, or zip files. Urgent or alarming language (“Your account will be closed!”). Sender display name vs. email address — the display name may match, but the actual email address may tell a different story. ✅ Example: dr.smith@myclinic.com ❌ Spoofed example: dr.smith@mycl1nic.com (notice the “1” instead of “i”). How to check: Hover over the sender’s name with your mouse (or tap on a phone) to reveal the full email address. Always peek under the name before trusting it. Grammatical errors or unusual phrasing — subtle signs of something not right. Suspicious headers — IT teams can check message headers to see if the email really came from your domain. Tips to Minimize Spoof Emails in Your Clinic While you can’t stop cybercriminals from attempting spoofing, you can make it harder for them to succeed: Work with your IT company to enable SPF, DKIM, and DMARC records on your email domain. These are special security settings that tell email servers which senders are authorized to use your domain name. If they aren’t set up correctly, attackers can more easily pretend to send emails as your clinic. Your IT company should be able to confirm whether you already have them in place and help configure them if you don’t. Train staff regularly on phishing and spoofing awareness. Even one click on a bad link can compromise security. Use multifactor authentication (MFA) for all accounts to add an extra layer of protection. Verify requests by another method — if you get a strange email from a coworker, call or message them directly before acting. How to Respond if Your Clinic Receives a Spoof Email If your office gets a suspicious message that appears to come from your own domain or staff: Do not click links or download attachments. Report it immediately to your IT or compliance team. Document the incident — and be sure to contact your HIPAA compliance provider for guidance on properly recording and addressing these types of events. Warn your staff so others know not to interact with the message. Work with IT to review headers and confirm it was spoofing, not a compromised account. What If Patients Receive Spoof Emails That Look Like They Came from You? This can be especially damaging to patient trust. If you learn patients have received spoofed messages appearing to come from your clinic: Notify patients ASAP — acknowledge that the email did not come from your office. Give clear instructions — tell them not to click links, open attachments, or reply. Provide reassurance — explain that their medical records and patient portals remain secure, and that this was a spoof, not a breach of your systems. * After confirming it was a spoofing email, not a compromised account . Share prevention tips — encourage patients to verify suspicious messages by calling the clinic directly. Continue monitoring — if spoofing persists, work with IT to tighten email authentication settings. Spoof emails are a growing threat in healthcare because they exploit trust — the trust patients place in their providers and the trust staff place in their colleagues. By educating your team and your patients, enabling the right protections, and responding swiftly when an incident occurs, your office can turn a potentially damaging attack into an opportunity to build stronger awareness and confidence in your security practices. FAQ: Email Spoofing in Healthcare Is email spoofing illegal? Yes. It is considered fraud and, in healthcare, spoofing can lead to HIPAA compliance issues if patient information is exposed. What does a spoofed email address look like? It may look almost identical to a real one — for example: Real : dr.smith@myclinic.com Fake : dr.smith@mycl1nic.com (with a “1” instead of an “i”). What happens if I open a spoofed email? Opening it alone usually won’t cause harm. The danger comes from clicking links, downloading attachments, or replying. Can spoofed emails be stopped completely? Not entirely, but they can be minimized. Setting up SPF, DKIM, and DMARC with your IT company, training staff, and enabling multifactor authentication all reduce the risk.